Showing posts with label ballon inspection drawings. Show all posts

Tuesday, November 8, 2011

Hole Table Padding - Adjusting beyond the standard limits

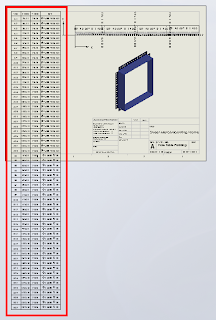
When adding Hole Tables to drawings the table often extends, vertically, beyond the limits or boundaries of the specified sheet size (see Pic_1). You may have tried to adjust the table font size and zeroed the Vertical Cell Padding dial to rectify this, but noticed that even though the padding dial is zeroed, there is still an amount of padding that remains around the text. This remaining padding takes up valuable space, let's see how we can reduce/shrink this cell padding to tightly hug the cell boundary.

Pic
_1: The Problem
Before we continue, remember that we can only fit so much on to a single sheet before it becomes unreadable, so there is obvioulsy a limit to how many rows you will be able to fit vertically on a specific sheet size.

Click anywhere in the table to activate its properties. You will see this dialogue appear above the table:


Note where the adjustment settings are for Font Size and Vertical Cell Padding. We'll get back to that in a second.

Next, click on the number 2 to select the entire row. Hold down the Shift key and select the last row in your table (I had sixty rows all up in this example). You should now have all rows except the heading row selected. With all rows selected you can change your font size; I have used 9, which is still quite readable and then we want to adjust the Vertical Cell Padding.

You will note though, that when you dial down (using the up-down arrow toggles) you will be stopped at zero. Naturally you will think this to be the limit, but alas, we know with Solidworks anything is possible. Simply select the Vertical Cell Padding field as below...


Type negative 1.8 i.e. -1.8 and hit the Enter key on your keyboard. You should now be looking something like this in the settings dialogue...


and your cell text will be hugging the cell borders all nice and cosy, like this:


And while we are at it, quickly click anywhere in the table, then click the black cross to the left of Column A to activate the table properties dialogue, which will appear to the left of your screen. We want to tidy things up a little before printing. In the properties dialogue select "Combine same sizes" and you will get this:


In the properties dialogue, click the green check mark to close and we're done.


You should now have your table fitting nicely onto your drawing sheet and looking much better than when we started.


Have a play with those settings and I hope that this has helped you somewhat to tidy up those Hole Tables.

Friday, July 22, 2011

Solidtec Becomes the First Reseller of InspectionXpert in Australia

InspectionXpert for Solidworks is a quality control solution used to quickly and accurately generate quality inspection report forms and ballooned inspection drawings directly from SolidWorks. InspectionXpert for SolidWorks balloons inspection characteristics directly on your 2D SolidWorks drawings. InspectionXpert for SolidWorks is a Gold Partner product.

Things you will love about this product:
  • Increased automation – no need to manually balloon inspection drawings

  • Faster report generation - no need to write or type in dimension and tolerance information into your inspection sheets

  • Increased accuracy – dimensions and tolerances are extracted directly from the SolidWorks drawing

  • More professional reports – feature control frames and detailed inspection information are populated directly into Excel

  • Better error proofing – inspection tolerances and limits are mapped to Excel where powerful formulas and conditional formatting verify your results and perform advanced calculations

With InspectionXpert, you can extract nominal dimensions, plus/minus tolerances, units, geometric tolerances, hole callouts, finish symbols, and notes and then export them to standard or custom templates in Microsoft Excel. Uniquely numbered inspection balloons are added next to each extracted inspection for easy navigation between the drawing and the inspection report form. These capabilities result in dramatically increased efficiency in the quality inspection process with a time savings of 50% to 90%.

The InspectionXpert product line eliminates the manual ballooning of inspection drawings and creation of inspection sheets for first article, in process, and final inspections.  InspectionXpert works as an add-in to many popular CAD programs. For companies who create inspection packages from multiple file types, InspectionXpert First Article works with PDF and TIFF file formats. 

Solidtec Solutions have become the first reseller of InspectionXpert in Australia and hope it provides another aspect to Solidtec’s differentiation as a SolidWorks reseller in the CAD market.

For more information on Solidtec Solutions visit http://www.solidtec.com.au .

For more information on InspectionXpert visit http://www.inspectionxpert.com/Default.aspx .