Showing posts with label Customize. Show all posts

Tuesday, November 8, 2011

Hole Table Padding - Adjusting beyond the standard limits

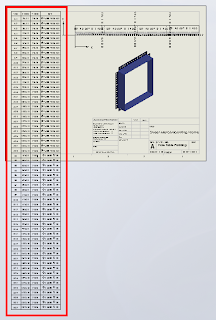
When adding Hole Tables to drawings the table often extends, vertically, beyond the limits or boundaries of the specified sheet size (see Pic_1). You may have tried to adjust the table font size and zeroed the Vertical Cell Padding dial to rectify this, but noticed that even though the padding dial is zeroed, there is still an amount of padding that remains around the text. This remaining padding takes up valuable space, let's see how we can reduce/shrink this cell padding to tightly hug the cell boundary.

Pic
_1: The Problem
Before we continue, remember that we can only fit so much on to a single sheet before it becomes unreadable, so there is obvioulsy a limit to how many rows you will be able to fit vertically on a specific sheet size.

Click anywhere in the table to activate its properties. You will see this dialogue appear above the table:


Note where the adjustment settings are for Font Size and Vertical Cell Padding. We'll get back to that in a second.

Next, click on the number 2 to select the entire row. Hold down the Shift key and select the last row in your table (I had sixty rows all up in this example). You should now have all rows except the heading row selected. With all rows selected you can change your font size; I have used 9, which is still quite readable and then we want to adjust the Vertical Cell Padding.

You will note though, that when you dial down (using the up-down arrow toggles) you will be stopped at zero. Naturally you will think this to be the limit, but alas, we know with Solidworks anything is possible. Simply select the Vertical Cell Padding field as below...


Type negative 1.8 i.e. -1.8 and hit the Enter key on your keyboard. You should now be looking something like this in the settings dialogue...


and your cell text will be hugging the cell borders all nice and cosy, like this:


And while we are at it, quickly click anywhere in the table, then click the black cross to the left of Column A to activate the table properties dialogue, which will appear to the left of your screen. We want to tidy things up a little before printing. In the properties dialogue select "Combine same sizes" and you will get this:


In the properties dialogue, click the green check mark to close and we're done.


You should now have your table fitting nicely onto your drawing sheet and looking much better than when we started.


Have a play with those settings and I hope that this has helped you somewhat to tidy up those Hole Tables.

Thursday, March 31, 2011

Customize Heads Up

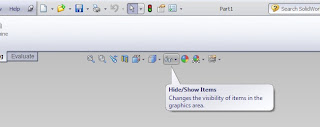
SolidWorks allows for a lot of user customization of which we have explained how to do a lot of this in previous posts. What I would like to show you now is how you can add toolbars to the heads up toolbar that sits at the top of your modeling window. I personally use the "S" a lot which allows me to access a flyout toolbar that contains the most common toolbars of which I can also customize what is available on this menu as well, but in this post I am going to show you the heads up toolbar. Out of the box this toolbar allows you to access differant view points, display styles, appearances, scenes, view options and graphic options. A feature I use a lot is the plane command which is located under reference geometry on the features toolbar and I am going to show you now how you can add this to the Heads Up Toolbar so it is easily available.


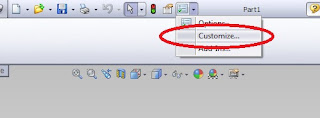
The 1st step is you must go to the Options Icon and from the drop down select "Customize".


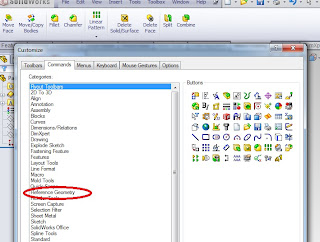
The 2nd step is to select the Commands tab on the Customize menu and in my case I select the Reference Geometry which will then bring up the toolbars under this menu drop down.


The 3rd step is now to drag the icon from the customize menu by keeping the left mouse button down and dragging it over the Heads Up Toolbar. Once over you will see a green tick and the Icon trying to squeeze between other icons and that is when you let go of the mouse button.


You have now succesfully added this feature to the Heads Up Toolbar and now in my example no matter what toolbars are on I always can quickly add a plane.